Why a Demonstration Makes an Idea Visible
A clear demonstration makes an abstract instruction observable, helping learners notice each decision, name the steps and practise the skill with purpose.
The common mistake in teaching a new skill is to give learners a sound instruction, then expect them to infer what it looks like in practice. “Handle the difficult question calmly” may be sensible advice, but it leaves a learner guessing about what to do first, what to listen for and how to choose a response. A demonstration makes the instruction visible: it turns an idea into actions that someone else can observe and examine.
A demonstration is not simply a performance for learners to watch. It is a deliberately chosen sequence that reveals how a skill works, including the decisions that are easy to miss when an experienced person acts automatically. Naming those decisions gives learners something to attend to and later practise. The aim is not to make every task look identical; it is to help people recognise useful moves and understand when they might apply them.
From advice to action
Abstract instructions often use words that describe a quality rather than a behaviour: be clear, show judgement, communicate professionally, or adapt to the situation. These qualities matter, but they do not tell a learner what to do in a particular moment. One person may interpret “be clear” as speaking slowly; another may add detail; a third may ask a question. Without an observable anchor, the instruction can produce several incompatible guesses.
A demonstration supplies that anchor. A trainer might show how to check a colleague’s understanding after explaining a change: pause, ask the colleague to describe the next action in their own words, listen for a gap, then clarify that point. The sequence gives “check understanding” a form. Learners can see what the phrase asks someone to do rather than treating it as a reassuring expression at the end of an explanation.
That does not mean the demonstration should convert a flexible skill into a rigid script. A sequence is useful because it makes choices visible, not because every learner must reproduce the same words or gestures. The distinction is between showing a workable route and declaring that it is the only route.
Choose a revealing task
The task for a demonstration should make the target skill noticeable. If the purpose is to teach how to summarise a discussion, a long, complicated meeting may obscure the skill beneath unfamiliar subject matter. A short exchange with a clear change of topic can make it easier to see how the speaker identifies the main point, leaves out a side issue and checks whether the summary is accurate.
Choose a situation learners recognise, but avoid loading it with details that distract from the intended learning. In a customer-service session, for instance, a brief question about a delayed appointment may be a better vehicle for showing how to acknowledge a concern than an intricate complaint involving several policies. The context should feel plausible enough to interpret while keeping the target action in view.
Be clear about the boundary of the demonstration, too. A trainer modelling a conversation can show a communication skill, but should not imply that the model settles a policy question or authorises a decision beyond the learner’s role. If the skill depends on workplace rules or specialist judgement, use an appropriate scenario and clarify what the demonstration is intended to teach.
Name the hidden moves
Some of the most useful parts of a skill happen internally: noticing a cue, weighing alternatives or deciding to pause. Learners cannot observe a thought directly, so the demonstrator has to make its practical signs and decision points audible. A short explanation before or during the model can connect what is visible to the judgement behind it: “I’m asking one question at a time because the request has two separate parts.”
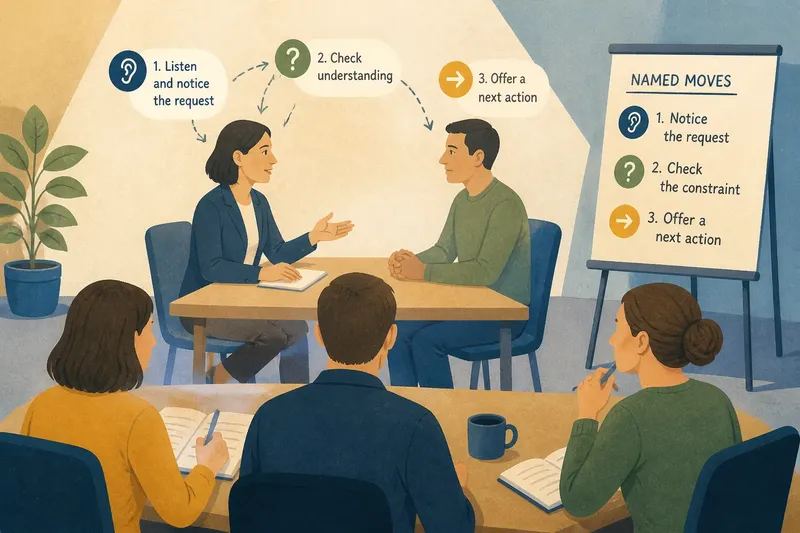
Labels for the steps should be brief and concrete. “Notice the request”, “check the constraint” and “offer a next action” are easier to follow than a string of abstract qualities such as empathy, efficiency and professionalism. Useful labels describe an action or decision in ordinary language. They give a group a shared way to discuss what happened without pretending the labels capture every nuance.
Keep the number of named moves small enough to hold in mind. If every glance, pause and phrase gets its own label, the model becomes a catalogue rather than a demonstration. Select the distinctions that matter most for the learning purpose; leave routine details unlabelled unless learners need them to recognise or reproduce the skill.
Make attention deliberate
Watching is not the same as noticing. Learners may follow the story of a demonstration and miss the action they were meant to study. Give them a specific viewing task before the model begins, such as listening for the moment the demonstrator checks an assumption, or noticing how a summary separates the main request from a secondary concern.
One prompt is often enough for a short model. If the task includes many features, show the sequence in sections, with a pause between them. A whiteboard can hold the named moves as they appear; a printed transcript can help learners mark a phrase or decision after the demonstration. These materials should direct attention to the model, not compete with it by presenting a second explanation at the same time.
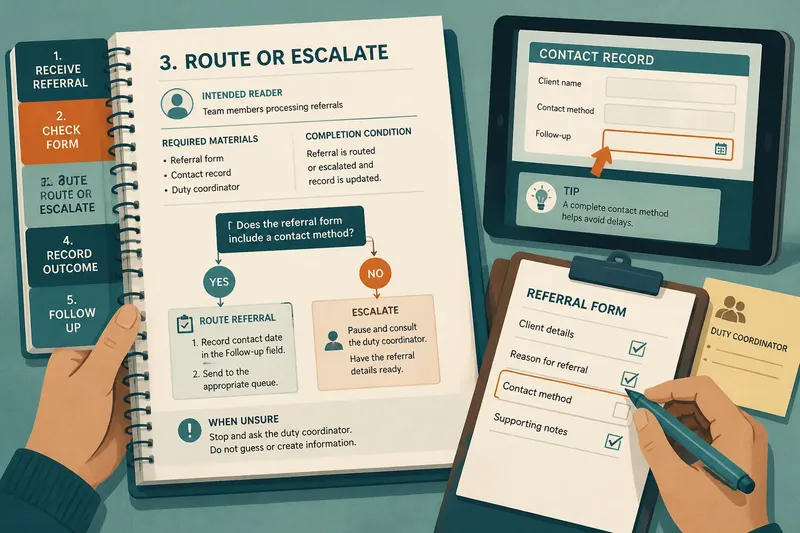
Make the important action easy to see or hear. In a live demonstration, stand where everyone can observe the relevant materials, such as a form or screen, and speak the decision that would otherwise be silent. In a recorded example, a short pause or a simple on-screen label can draw attention to a turning point. The goal is not visual polish; it is access to the feature that carries the learning.
Show choices, not theatre
A polished model can mislead if it makes a difficult skill seem effortless. Learners may see the result without understanding the adjustment that produced it. A more instructive demonstration can include a brief pause to name a choice, or show a first attempt that misses a relevant cue followed by a deliberate correction. This makes judgement visible without turning the session into a performance of failure.
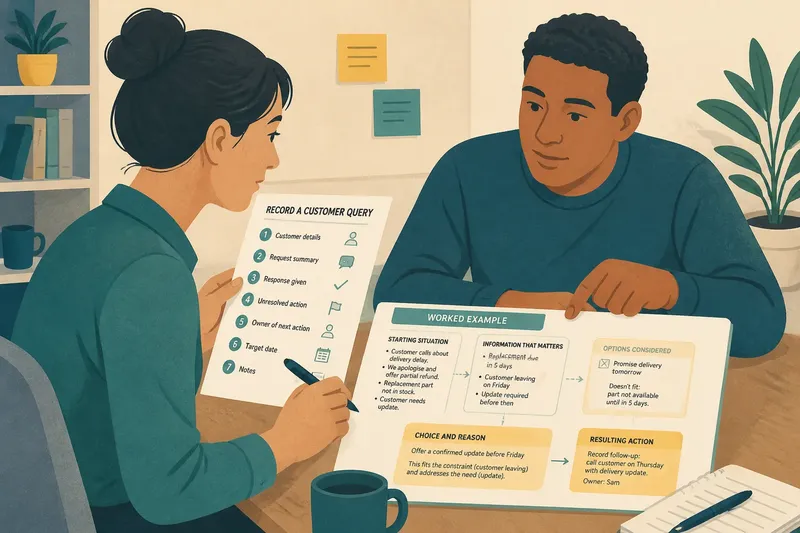
Say you are teaching a team to write a concise handover note. You could begin with an invented draft that records events in the order they happened but leaves the next action unclear. As you revise it, name the decision to move the required action to the top, retain the detail the next colleague needs, and remove a side comment. Learners can then compare the starting draft with the revised one and identify how each move changed what a reader would notice.
That example also shows why a model should not conceal its limits. A good handover may need different information in another workplace or for another recipient. The demonstration can still make the transferable decisions visible—what the next person needs, what is urgent, and what can be omitted—without presenting one finished note as a universal template.
From model to practice
After learners have seen the sequence, invite them to practise a manageable part of it. Ask them to repeat the skill in a fresh but comparable situation, using the named moves as prompts rather than as words to recite. A learner practising a summary might first identify the main request, then give the summary aloud and check whether the other person recognises it.
Listen for the decision as well as the finished action. If a learner uses a different phrase but makes the relevant distinction, the variation may be entirely effective. If the learner skips a step, ask what they noticed and how they chose what to do next. This keeps feedback connected to the logic of the skill rather than to superficial imitation of the demonstrator’s style.
For a group, a useful follow-up is to compare two approaches to the same task. Ask learners to point to the moment where each approach responds to the cue, and discuss what the choice makes possible. The discussion should stay close to observable details: what was said, what information was used, and what the next person could understand. Broad judgements about who seemed “natural” are less helpful because they do not tell anyone what to practise.
Common questions?
How long should a demonstration be?
Keep it only as long as needed to reveal the target sequence and the decisions that shape it. If the demonstration contains several distinct skills, divide it into sections and give learners a clear focus for each one.
Should learners see a flawed attempt?
A flawed attempt can help when the error is recognisable and the correction reveals a useful decision. Show it deliberately and explain what changed; an unexplained poor performance can leave learners uncertain about which parts to copy.
Should a demonstration be scripted?
A script can help keep a model focused, especially when several trainers need to teach the same core moves. Leave room for natural phrasing, and distinguish essential decisions from words that can vary with the learner and situation.
What if learners disagree with the model?
Ask them to identify the point of disagreement and the evidence in the scenario that informs their alternative. That conversation can reveal where the skill allows judgement and where a workplace rule sets a boundary.
Keep the model useful
What is not worth the effort is dressing a demonstration with elaborate props, elaborate staging or a long backstory when those details do not clarify the skill. A familiar form, a brief scenario and a visible sequence are often enough. Add material only when it helps learners notice a choice they might otherwise miss.
After the session, check whether learners can name the moves and recognise them in a different task. If they can recall a phrase but cannot explain what it helps them notice, the labels may be too vague or the model may have hidden a decision. Revise the demonstration around that gap: choose a clearer cue, make the decision audible, or separate two moves that were difficult to distinguish.
A demonstration makes an idea visible when it connects a specific situation to observable action and gives learners a simple language for what they saw. The most useful model is not the one that looks flawless; it is the one that lets someone else notice, question and practise the judgement inside the skill. That is what makes the instruction available for use beyond the training room.